


Hey there, BELO Babe! As a top-class lash tech, you need to pay close attention to those tiny yet crucial details about your clients, using your artistic expertise to create jaw-dropping lash extensions to bring out their best.
Now, let's talk about an important step in the application process that requires maximum attention to detail: lash mapping. This is where you get to unleash your creative side and strategically plan out where those lash extensions go. It's all about complementing the client's eye shape, desired style, and natural lash characteristics.
In this guide, our team of lash experts have crafted an in-depth tutorial on one of the most popular styles out there — cat eye lash extensions. Primed with this knowledge and the right cat-itude, you'll be lashing like a total pro in no time!
What are cat eye lash extensions?
Cat eye lashes are an eyelash extension style that is designed to mimic a feline or 'cat-like' appearance, enhancing a client's natural eye shape and lifting their eyes for a captivating look. Cat eye extensions are characterised by longer lash extensions towards the outer corners of the eyes, gradually tapering towards the inner corners.
There are several different types of cat eye lash extensions, which include:
- Extreme cat eye
- Hybrid cat eye
- Wispy cat eye
Whatever style you choose, cat eye extensions add depth, intensity, and allure to the eyes, making them a go-to choice for many individuals today.
Lash mapping and application
When building a lash map, your goal should be to mark and measure the natural lash line, talking with your client to discuss their look and design a customised map based on their preferences. Below, we have included a step-by-step guide to cat eye lash mapping and application, one which you can follow in your own appointments!
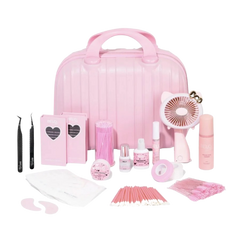
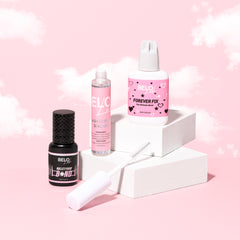
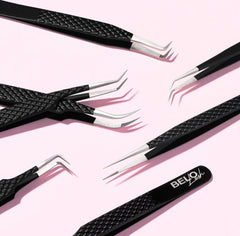
Step 1: Prep like a pro with professional lash supplies
As we often say here at BELO, a lash artist is only as good as their tools, and even the most skilled technician will only get so far with a set of sub-par materials. From high-quality lash adhesives to a wide range of lash lengths, curls, and styles, these supplies will be your secret weapons to creating lash magic.
Step 2: Chat with your client
Talk with your client about what they want from their lash treatment. For example, if they are looking for a more subtle, natural lash look, avoid opting for lashes that are too long and thick, as this can take away from their specifications. However, if they want a vibrant lash look, this is your go-ahead to get creative with length and curl options to achieve a more visually dramatic set.
To master the famous cat eye look for your client, you should be starting off with the shortest lashes at the inner corner, gradually growing until their optimal length at the outer corners. The length of your eyelash extensions should grow gradually to accommodate this.
Step 3: Assess your client's eye shape
Before we get you started with cat eye lash mapping, it is important to analyse your client's eye shape and natural lashes first. Some of the most common eye shapes include round, almond, downturned, hooded, and upturned eyes. Remember, each eye shape will require a specific approach to achieve the cat eye effect, and it is important to be aware of this so you can adapt your lash map accordingly.
Step 4: Start mapping
Imagine drawing a line from the outer corner of the eye towards the end of the eyebrow. This line can serve as a guide for the winged effect that defines the cat eye style. To help you along the way, use lash mapping stickers or a white eyeliner pencil to mark key points along the lash line, such as the inner corner, middle, and outer corner of the eye.
Step 5: Choose your lashes
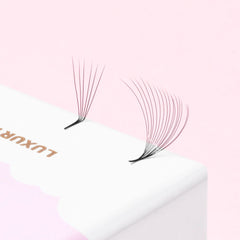
Decide on the lash lengths and curls that will create the cat eye effect your client is looking for. For example, if your client wants an extreme cat eye, opt for lengths that go beyond the natural lash line, allowing for that exaggerated, dramatic effect.
Choosing the right length for your client's lash extensions is also key to getting the cat eye style mastered. Go for lashes with longer lengths on the outer corners and gradually transition to shorter lengths toward the inner corners. This technique enhances the natural eye shape and helps to provide that cat eye effect. Professional eyelash extension supplies, such as easy fan lashes or volume lashes, can also help you create the perfect look with ease.
Step 6: Apply the lash extensions
Before lashing begins, make sure to place some eye pads under your client’s eyes to ensure they have a comfortable treatment experience. Next, starting from the inner corner of the eye, work your way towards the outer corner, following the lash map you have just created. Attach longer lashes on the outer corners and gradually transition to shorter lengths as you move inward.
Step 7: Pay attention to the angles
As you apply the lash extensions, be mindful of the angles at which you attach them. The lashes on the outer corners should be slightly angled upwards to accentuate the winged effect.
Step 8: Fill in any gaps
Once you've applied the main lash extensions according to the map, assess if there are any noticeable gaps or areas that require additional coverage. Fill them in with carefully placed individual lash extensions to achieve a complete look.
Step 10: Finishing touches
Once you're happy with your lash map and the placement of the extensions, finish the lash application by securing all the lashes, ensuring they are properly adhered and are comfortable for the client. And there you have it, beautifully applied cat eye extensions!
Tips for building the perfect cat eye lash map
To achieve the best results, every time, follow some of these tips, designed exclusively by our BELO girls!
Tip #1: Use an L or M curl to lift up the outer corners
When mapping cat eye lash extensions, many lash techs opt for the L or M curl to lift up the outer corners of their eyes. By selecting lashes with these curls, they achieve a more pronounced winged effect and enhance the overall cat eye appearance. The L curl has a gentle lift, while the M curl offers a slightly more pronounced look. Both options help by adding that extra lift and definition to the outer corners of the eyes, perfect for perfecting the cat eye style.
Tip #2: Customisation is key
Remember, the entire point of lash mapping is to create a perfect look that caters to your client's unique eye shape and natural lash characteristics. For example, if you are working with someone who has more round eyes, you can slightly extend the cat eye wing effect to elongate and lift the eyes. For clients with more almond-shaped eyes, on the other hand, focus on enhancing the outer corners to emphasise the cat eye appearance. Adapt the lash map accordingly to create a customised look that flatters their unique features.
Tip #3: Practice makes purr-fect
Building a cat eye lash map may take a few attempts to master, so don't be discouraged if it doesn't turn out exactly as planned initially. With time and experience, you'll become a pro at creating stunning cat eye lash extensions.
For those interested in different lash styles, such as Doll Eye or Fox Eye, be sure to explore our guides on Doll Eye Lash Mapping and Fox Eye Lash Mapping.
Get mapping today
Now, with your lash maps in hand and your creative juices flowing, you're ready to conquer the lash industry with confidence and ease. Remember, as a lash artist, you hold the power to make eyes sparkle, hearts flutter, and confidence soar. So go ahead, unleash your inner feline artist, and let the lash magic begin!
And if you need some help getting started, our team at BELO Lash are fully-stocked with a great range of professional eyelash extension supplies and training courses, ideal for artists who want to get the very best for their clients.