


Lash glue and lash extensions are a match made in heaven. Without one, the other wouldn't work; they complete each other and enhance each other’s star qualities. But even the most experienced lash technicians struggle with glue drops and lash dipping techniques sometimes, which is why continuous learning about quality lash glue is crucial for any ambitious lash technician!
Here at Belo Lash, our aim is to educate lash techs on improving their application techniques for more resilient, professional, and iconic lash extensions. Because who says looking fabulous is just for special occasions (hint: definitely not us)!
With this in mind, we’ve put together a step-by-step guide on the proper technique for dipping lashes in lash glue to ensure optimal retention and longevity of lash extensions. Let’s get dipping!
How To Dip Lashes In Lash Glue And Apply Eyelash Extensions Perfectly: A Step-By-Step Guide
To create beautiful, show-stopping, long-lasting eyelash extensions, you need a solid foundation. In the world of lash artistry, that foundation is high quality lash glue.
Knowing how to perfect the art of lash dipping and lash glue drop application will not only allow you to create a stronger lash line, but it will also enhance your client’s experience and keep your tools in good condition.
Let’s look at how to correctly dip lashes into lash glue like a pro for gloriously aesthetic and stable eyelash extension applications.
Step 1: Purchase high quality, fresh eyelash extension glue
Before you do anything, do a bit of lash glue drop inventory. Lash glue gets old just like any other product, and if it’s not fresh, it can become sticky or brittle when it dries.
Make sure you have the right glue type for the lashes you will be using (more on different lash types and glue pairings further down) and that it is fresh so that your lash dipping experience is as smooth as possible.
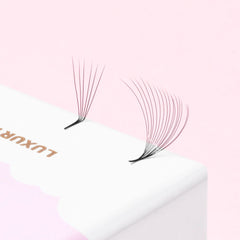
Step 2: Map and set out your lashes
Okay, so you’ve got your fresh lash glue and are ready to apply it. What next? Whip out the lash map you’ve created for your client and set out the lashes you will use in the order of application. This ensures that the eyelash extensions are ready to use when you get your glue out.
Step 3: Start with two drops of lash glue
You don’t need a lot of lash glue to create fabulous-looking lash extensions. Two drops should suffice for both eyes.
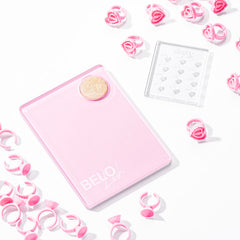
To keep your adhesive handy and stable, opt for our Heart Glue Rings. These rings provide a convenient and clean way to manage your glue during application. By placing your two drops directly into these glue rings, you can ensure they stay firm and accessible, allowing you to apply lash extensions efficiently and effectively.
The glue drop will be quite firm, so you don’t need to worry about it running away. This type of adhesive should be used sparingly - live by the motto that it is easier to add than subtract!
Step 4: Dip your lashes into the glue with tweezers
The next step in applying lash extensions with eyelash glue is to dip your lashes into the glue correctly with a pair of professional tweezers. This will help ensure a stable application of each lash extension and help the adhesive stick on as securely as possible.
Step 5: Go in at a 90-degree angle
Avoid dipping your lashes too aggressively into your glue drop or pot. Once you have the perfect grip, dab your lash extensions in slowly and carefully at a 90-degree angle so that it does not get dipped excessively. You don't want glue to drip on your client's skin or to come into contact with their eyelids.
Step 6: Make a scooping motion to pick up the glue drop
Another useful tip for lash dipping is to make a scooping motion with your lashes. This can help the lash adhesive stick in a way that prevents over or under-loading your lashes with glue.
Step 7: Securely apply your lashes to the lash line until complete
Once you have the dropping and lash dipping techniques down, all that is left is to apply your lashes one by one until each eyeline is completely filled with gorgeous dark lashes.
Remember to keep each lash in close proximity to the next, be mindful of stray hair, and treat your clients with the utmost level of professionalism. You’re more than just a lash artist; you’re a bestower of beauty and confidence!
Common Mistakes To Avoid During Lash Glue Application
Great lash retention and appearance hinges on your application technique. But being a lash artist isn’t always easy, and there are common mistakes to be aware of that could cause hiccups along the way. Here are a few to avoid and be aware of when crafting lasting looks:
Using too much eyelash extension glue
Using an excessive amount of eyelash extension glue can have catastrophic results. Too much glue will not only result in lash stickies and a gloopy mess, but it can also damage your client’s lash line and degrade your tools. Plus, it's a waste of good product and money!
Using too little eyelash extension glue
Too much eyelash glue may be a big problem, but so is not using enough. Too little glue will mean the lashes aren’t able to fully adhere to the lash line, resulting in a weak bond that is prone to breakage and lash loss.
Not preparing the lash line properly
If your client's lashes aren't cleansed properly before a lash treatment, the glue will struggle to adhere to the lash line. Dirt, sweat, and old makeup should always be cleaned off the eyes before applying glue.
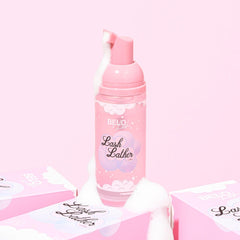
For optimal preparation, use our Lash Cleanser, a foaming shampoo designed specifically for cleaning eyelash extensions and the eye area. This cleanser effectively removes any oil residue and ensures that the eyelash extensions are perfectly prepped for application.
Accompany your use of the cleanser with our Lash Cleanser Applicators. These foam applicators ensure a deeper and gentler clean along the lash line, and can also be used for lash extension removers.
Together, these products ensure that the eyelashes are free from build-up and ready for a flawless application, helping to improve lash retention and overall eyelash hygiene. Many lash technicians will not accept clients who arrive with dirty lash extensions, as the extra cleaning required can significantly extend the appointment time. By using these pre-treatment products, you can maintain the highest standards of cleanliness and efficiency in your lash applications.
Poor quality lash glue drop
Old or low-quality glue will not produce good results for your clients. Always store the bottle of adhesive correctly to ensure it remains in optimal condition. If your lash glue isn't stored properly, it may not stick effectively, impacting both the appearance and longevity of the eyelash extensions.
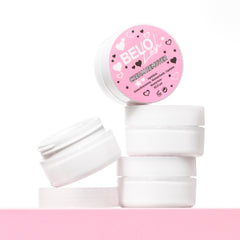
To maintain the freshness and effectiveness of your eyelash adhesive, consider using our Air Tight Adhesive Container. This container is designed to keep your lash glue fresher for longer, thanks to its airtight design that prevents exposure to air and moisture. It holds up to three bottles and is an essential tool for every professional lash technician who strives for top-quality application. By storing your adhesives in this sleek and stylish container, you ensure they are kept in a cool, dark place, away from any detrimental environmental factors. This practice not only extends the life of your adhesives but also helps maintain the bond quality, reducing the chances of retention issues.
Using glue with a too quick or too slow drying time
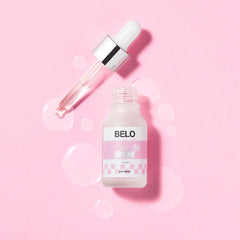
Selecting the appropriate lash glue is critical for both the application process and the longevity of eyelash extensions. We offer a range of adhesives tailored to different skill levels and application speeds to ensure every lash technician can find their perfect match.
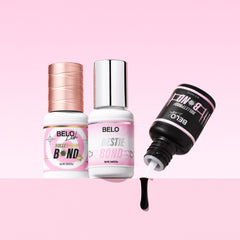
- Bulletproof Bond Adhesive: Ideal for experienced lash technicians, our Bulletproof Bond features a quick 1-second drying time. This adhesive is perfect for rapid application, ensuring that extensions adhere swiftly without creating stickies. It is particularly effective for classic, Russian volume, and mega volume lash extensions, providing incredible retention and a dramatic eye effect. Learn more about our Bulletproof Bond Adhesive here.
- Bulletproof Max Adhesive: When you need even faster setting times, Bulletproof Max is the go-to with a drying time of just 0.5 seconds. This glue is best suited for advanced technicians specialising in classic and Russian applications, who require the fastest possible setting time for efficient appointment turnovers. Discover our Bulletproof Max Adhesive here.
- Bestie Bond Adhesive: Offering a slightly more flexible drying time of 1-2 seconds, Bestie Bond is excellent for technicians who need just a bit more time to adjust their placement. This glue is robust, suitable for both classic and volume lash extensions, and helps create a full lash line look. Explore our Bestie Bond Adhesive here.
Each lash glue is designed to work within specific temperature and humidity ranges to optimise performance and prevent issues such as shock polymerisation. It's important to choose an adhesive that not only matches your lashing speed but also your experience level to avoid premature curing or poor adhesion.
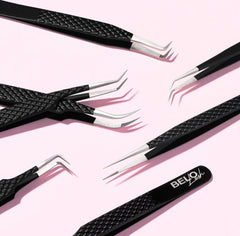
Using dirty tweezers that collect sticky lash glue drops
Maintaining clean and sterile tools is an essential practice for every professional lash artist, not just for safety but for the integrity of your work. Dirty tweezers can hinder your ability to perform basic lash techniques effectively. They are more likely to accumulate sticky lash glue drops and attract dirt, which poses a risk of exposing your clients' eyes to potential contaminants.
It's crucial to ensure your tweezers and other tools are impeccably clean at all times. Want to learn more about keeping your tweezers in pristine condition? Check out our detailed guide on how to properly clean your lash tweezers here. Follow these tips to remain a clean queen and ensure flawless lash applications every time!
Lash Dipping Like A Pro
Lash dipping is a crucial skill for every lash artist, and mastering the art is as easy as getting the basics right.
The most important points to remember when applying lash glue are to use fresh, high-quality glue, use the right amount (not too little, not too much), and dip the lashes in a scoop motion at a 90-degree angle. Let the lash magic begin!