Stickies may be a cute nickname, but they are not a cute look. The unintentional bonding of adjacent lashes during lash extension applications is a common problem faced by many lash technicians.
These icky stickies don’t just look unprofessional; they’re also sure to annoy clients, and they make a bit of a mess. The good news? Avoiding lash stickies isn’t all that hard. You just need to know how to isolate lashes, apply the right amount of lash glue, and position lash extensions to keep them from getting too up close and personal.
Let’s get you unstuck!
The Nitty Gritty Of Lash Stickies
Stickies happen when a lash gets stuck to another neighbouring lash. Too much lash glue, incorrect placement, failing to isolate lashes properly, or not allowing the adhesive time to dry between applications causes lashes to stick together and cause drama. These unwelcome clumps can mess up your tools, create messy eyelash extensions, and generally just be frustrating to deal with.
Top Causes Of Lash Stickies
Once you know what causes lash stickies to develop, it becomes so much easier to banish them for good. With enough practice, you’ll be able to spot stickies from a mile away and prevent them from impacting your lash application process.
These are the red flags of lash stickies to be aware of when you apply extensions:
- Old or expired lash glue: Sticky, gloopy, old lash glue makes it virtually impossible to apply lashes cleanly and efficiently.
- Shaky hands: While they can be hard to avoid at times, nervous or shaky hands can cause delicate lashes to stick to one another when they shouldn’t.
- Weak grip tweezers: If your tweezers aren’t able to grip individual lashes properly, a clean application becomes very tricky.
- Lack of experience: Practice makes perfect, after all! The more time you spend working with these delicate products, the easier avoiding those dreaded lash stickies will be.
Just like any skill set, lash extension application takes time and effort to master. By being aware of common sticky causes, you can dodge them at every corner.
How To Avoid Stickies When Lashing
Whether you are a seasoned lash tech or still a little new to the game, stickies are a fact of life.
But they shouldn’t happen all the time, and there are ways to prevent and avoid them. Many of the avoidance tactics relate to practice and skill development that takes time, but the rest come down to a few simple, easy tricks that any level of lash artist can use.
Use tape to isolate your lashes
After your client has undergone their cleansing pretreatment routine, lift and set the natural lashes back with a bit of tape.
This will help keep the natural lash line as consistent and still as possible so that you can see exactly where to place each lash extension going forward. It will also give you better insight into where to place your lash glue and which angles will be best for a clean, sticky-less lash line.
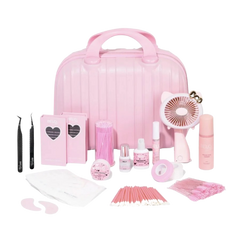
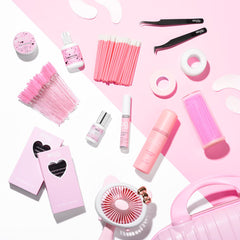
We stock a variety of different types of tape at Belo Lash, including transpore tape, silicone tape, Nichiban medical grade breathable tape and more. Explore these products to find the best fit for you and your clients!
Move slowly and carefully
The key to perfectly isolated lash extensions and sticky-free applications is to move slowly and intentionally. As the saying goes, haste makes waste, and in this case, the old adage certainly rings true.
Don’t rush through your process. From the glue dropping and the lash dipping to the lash isolation and application itself — take it easy. A few deep breaths between each lash application will keep you calm and ensure the adhesive is dry, and it will make your client feel calmer, too.
Be mindful of how much lash glue you use
Too much lash glue is one of the biggest culprits behind lash stickies. You should only have one or two drops of lash adhesive at your station, and dipping your lashes into them should be a gentle and conservative practice.
The best depth to dip your individual false lashes into glue is a few tiny millimetres, depending on the length of the lash. The longer the lash, the deeper the dip. For advice on lash dipping, be sure to read our article all about how to correctly dip lashes in lash glue.
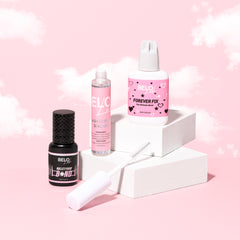
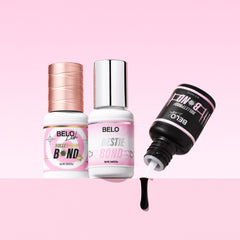
The quality of the lash adhesive you use also plays a major role in how many stickies are likely to develop. Fresh, well-maintained lash glue will produce the best results (naturally), while old or expired glue will be gloopy, causing stickies to form.
Invest in quality lash tweezers
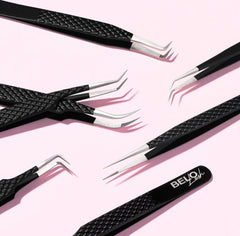
Another vitally important tool for fending off against rogue stickies is the humble tweezer. Quality tweezers should never be underestimated as tools for producing professional, gorgeous lash lines while affording you ultimate control over movement.
At Belo Lash, we stock a range of high quality lash tweezers, many of which are specifically designed for lash isolation and precise eyelash extension application.
How To Correctly Isolate Eyelash Extensions
When it comes to how to avoid stickies when lashing, mastering the art of eyelash extension isolation is a great place to start. If you can effectively isolate each lash fibre before applying them to your client’s lashline, stickies will have a hard time forming.
The best way to isolate lash layers is to use grippy, high precision tweezers, work from an organised lash extension station, and use tape to keep the lashes firmly aligned as you need to apply them to the natural line. Lash mapping can also help as you create a template that allows you to see where you may get stuck!
What Is The Right Amount Of Eyelash Extension Glue?
Let’s talk about lash glue for a moment. Glue is such an important part of the eyelash extension process—it holds everything together from start to finish. Choosing the right lash glue for your lashes, storing it wisely, and using the correct amount are all essential lash artist skills.
The right amount of eyelash extension glue depends on the lashes you are using and the client in question. However, most sets will only require one or two drops overall.
In terms of each individual lash, you should be dipping them 1 to 3 mm deep before applying them to your client’s lash line. If you are working with Classic or short lashes, 1 mm should do the trick. Anything longer, such as volume lashes, may need a 2 or 3mm glue dip to set well.
The Making Of A Lash Map: Map Sections And More
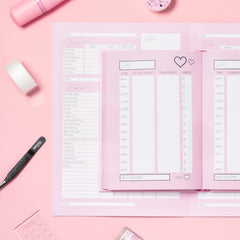
The ultimate way to ensure your lashes are applied evenly and gorgeously is to use lash mapping. Lash mapping is exactly what it sounds like. It is the process of drawing up a custom layout or pattern of lashes for individual clients, giving you a reference to work from during each session.
Without a lash map, the risk of placing extensions haphazardly increases. It is not essential for creating clean lash lines, but it certainly helps—and it reduces the chance of unwanted lash stickies developing along the way. Win, win!
How To Remove Stickies
Even the most experienced lash artists encounter lash stickies from time to time. Fortunately, when stick happens, getting rid of it is relatively simple. You’ll need to gently pull the lashes apart using tweezers or a spoolie to separate them.
If the lashes won’t come unstuck, you can use the banana peel method to remove the offending extension from your client's natural lash. If lash stickies are especially stubborn, it is best to remove them and start over rather than forcing a separation.
Say Stick’em Up To Lash Stickies
Lash stickies may be annoying and common, but with the right strategies and tools, they don’t have to derail the lash artistry process.
By developing a strong lash isolation technique, utilising lash mapping, and investing in the right eyelash extension glue, you can prevent stickies from occurring and become a better, more precise lash technician. Say no to stickies and yes to sleek precision!

