


Every lash artist has the same main goal: to have their clients walk out looking and feeling their absolute best. But in this pursuit for perfection, we can't overlook the importance of safety and the wellbeing of our clients. An essential part of offering safe lash treatments is conducting patch tests before applying eyelash extensions.
In this blog, we'll be discussing the importance of patch testing, how to conduct the tests, as well as going through some handy tips to help ensure a smooth and completely safe experience for the client.
Why are patch tests important?
Patch testing is absolutely important for ensuring safe eyelash extension treatments. As lash artists, we work extremely close to our clients’ eyes and there's always a chance that they could have an allergic reaction to the adhesive, especially if they have sensitive eyes. With an initial patch test, you'll be able to spot any allergies your client could have and tailor your eyelash extension treatment accordingly, ensuring a safe eyelash treatment from start to finish.
Implementing patch testing as standard practice with your lash treatments will also help to instil trust and confidence in your clients. They'll definitely appreciate the extra safety precautions you're taking to ensure their eyes and skin don't experience any allergic reaction. This commitment to safety and professionalism can also set you apart from your competitors and boost the positive reputation of your lash extension business.
How to conduct a patch test
Step 1. Gather the necessary tools
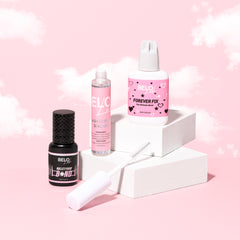
To conduct the patch test, you'll need to prepare a small amount of eyelash adhesive, lash extensions, adhesive remover, a clean micro brush, tape or glue stickers, and a timer. It's especially important to have the adhesive remover handy in case your client develops an adverse reaction to the lash glue.
Step 2. Prepare the patch test area
Before the patch test, set up a comfortable space where your client can relax during the testing process. You'll also need to thoroughly sanitise the work area and ensure that all your tools are sterilised.
Step 3. Explain the patch test procedure to the client
For maximum peace of mind, explain the patch testing process to your client. Make sure you clearly communicate the purpose and importance of the test. This also gives them the opportunity to ask any burning questions and provide their consent to the test.
It’s also important to explain that this patch test will differ from tests they may have done before at a hair salon, where the product is applied to a small section of skin. The main potential irritant in the lash extension process is the adhesive, which should never be applied to skin and should only touch the natural lashes. For this reason, the patch test needs to be conducted on a small section of the client’s natural lashes.
Step 4. Apply the patch test
To apply the patch test, you'll first need to clean the client's lashes and eyelids with a gentle cleanser.
(Psst! Looking for a new lash cleaner? BELO's Lash Cleaner is perfect for pre-application, post-removal, and keeping lash extensions clean between appointments!)
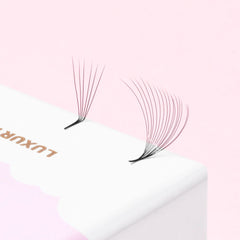
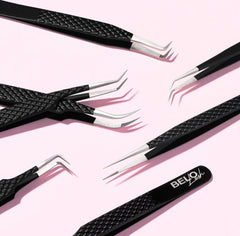
Isolate a small area on the clients natural lashes with a pair of isolation tweezers and a bit of tape or glue stickers. Once isolated, use the micro brush to apply a small amount of the adhesive to the area and carefully place an extension onto the adhesive. Make sure they're secure and comfortable for the client. Apply single extensions to up to 10 natural lashes on each eye – don’t do more than this!
Step 5. Monitor the patch test
The patch test should be left on for 24-48 hours, and during this period it's important that you inform your client to monitor the area for signs of a reaction. This includes any discomfort, irritation, redness, itching, or swelling. You'll also need to remind them to avoid scratching or rubbing their eyes during this time.
Step 6. Evaluate the patch test results
After the recommended time has passed, carefully examine the test area and see if there are any signs of an allergic or adverse reaction. If they've experienced any kind of discomfort or allergic reaction, even a minor one, immediately remove the extensions using an adhesive remover. If no reactions have occurred, your client is ready for their fresh pair of eyelash extensions!
Expert tips for patch testing
#1: Use high-quality products
Investing in high quality lash products is one of the best ways to avoid irritation and reactions. This is especially important for people with sensitive eyes as they're more likely to experience reactions. Luckily for you, we stock the highest grade lash products and tools here at BELO Lash! From eyelash extensions, adhesive, cleansing agents, and adhesive remover, all our offerings are designed for use around the delicate area around your eye and eyelashes. They're also produced with high quality ingredients and materials to ensure minimal irritation.
#2: Follow manufacturer’s guidelines
During patch testing and extension application, always follow the manufacturer's guidelines. Each adhesive and product you use may have different instructions and recommended patch test durations. By strictly following these guidelines, you'll be minimising the chance of a reaction while demonstrating your commitment to providing safe eyelash extension treatments.
#3: Document patch test results
For an even more thorough patch testing procedure, keep detailed records of your clients' patch test results. Take note of any allergic reactions, irritation, sensitivities, or other observations that you think are important. This will help you tailor your procedure to everyone's needs and avoids any potential issues in the future, especially with regular clients.
#4: Educate your clients
One of the best things you can do during the patch testing process is taking the time to educate your clients about its importance. Go through the potential risks of skipping the patch test and emphasise the safety measures that you're taking to maintain their eye health. You'll also be empowering them with this knowledge, which helps to build trust and establish a strong, and potentially long term, client-technician relationship.
#5: Stay up-to-date on industry standards
The lash industry is always evolving, with new eyelash extensions, lash products, and extension application techniques constantly popping up. Stay updated with the latest industry standard by attending training sessions, conferences, and workshops to upgrade your eyelash skills and knowledge. By staying on top of the latest techniques, you can provide the best possible lash extension service to your client base.
Patch testing is one of the most important steps that needs to be taken prior to a lash extension treatment. A great last artist will conduct one prior to applying new extensions to ensure the safety and wellbeing of their clients. By following our step by step guide along with our expert-approved tips, lash artists can minimise the risk of allergic reactions and provide a safe and beautiful lash extension treatment. Got questions about patch testing or which products to use? Get in touch and the BELO team will be happy to help!