


Volume lash extensions are a go-to option for most lash technicians and their clients, but volume extensions can be fiddly and time-consuming. Finding a failsafe method that ensures a fluffy, beautiful, and weightless volume lash set quickly is the key for any lash artist.
Here at BELO, we’re all about sharing helpful tips for the lash community, so we’re going to let one of our favourite volume lashing methods do the talking: the pinch method!
The pinch method has increased in popularity over the last couple of years, so you’ve probably seen a TikTok here or there demonstrating it, but this is our guide on mastering the easiest method for volume lashing.
What is the Pinch Method?
The pinch method is a popular and effective volume lashing method used by lash artists of all levels. As the name suggests, the pinch method requires lash techs to create a volume fan by using their fingers to pinch the base of the lash extensions into a fan shape.
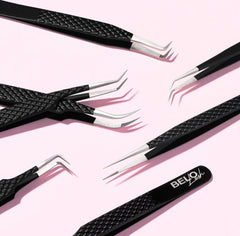
Pinching is the perfect method for beginner lash techs to master volume and mega volume techniques. This method is quick, easy and requires less glue than other volume lashing methods. All you need is a good pair of eyelash tweezers with enough grip, quality volume lashes and some patience!
Step 1: Remove Lashes From the Strip
Grab your favourite pair of lash tweezers to get started. As with any volume fan, you’ll need to select the amount of lashes you will be using to construct your fan. The more lashes you pull off the strip, the bigger the lash fans will be. With the pinch method, you may find it easier to practise with more individual lash extensions per fan as the tension between the fibres can make them easier to manipulate into the right shape.
Always keep in mind your client’s desired look when selecting the lashes for your volume fans. It’s easy to get carried away with how easy the pinch method is and become obsessed with 18D volume fans! Think about whether they want the look to be wispy, full, hybrid or mega volume and select your lashes accordingly. It’s also good to bear in mind the condition of your client’s lashes - avoid heavy fans if they have weak natural lashes, for example.
You may also be interested in our blog: Hybrid Lashes vs. Volume lashes
Using your tweezers, lift your desired number of extensions from the lash tray, gripping the middle of the lashes just on top of the sticky strip they are attached to. This ensures that you do not damage the shape of the lash curl when lifting the extensions from the tray. Pull towards yourself and upwards and avoid twisting the bases. Keep the tension in your selected lashes until you’re ready to pinch.
The quality of the tweezers and the lashes you use will affect how your client's lash look. For example, if you’re struggling with grip, you may find that you lash fans look a little messier. Make sure to use a tweezer that you have a lot of control using. Also, BELO’s whole range of lashes are suitable for the pinching method, no matter which style you prefer.
Step 2: Pinch the base of the lashes into a snatched point.
For the second step, take your selected lashes and use your index finger and thumb to manipulate the extensions. We find it easier if you hold the extensions toward your chest as it gives you more control than if they are facing away from you. Pinch the bases of the selected lashes together with your index finger and thumb - no not twist the fibres of the lashes. If you roll the base of the lashes when attempting to create a fan, it will twist your base and the fan will be useless as it will be the incorrect shape.
While you’re pinching the bases of the lashes, slowly release the pressure on your tweezers to allow the lash fans to move. This part is a little tricky. While pinching looks pretty simple at first glance, there is some technical skill involved. Keep practising to get them just right. You’re looking for a wide fan at the top of the lashes and a snatched, pinched base. When you first use the technique, you’re not going to get the fan exactly right with one pinch. Alternate the pressure you place on the base to manipulate the fan correctly.
For more control, rest the tip of your tweezers on top of your thumb when you start to release pressure. This way, it becomes easier to direct the eyelash extensions in the direction you want them to go. If you don't know which tweezers to use, read our lash tweezer guidance for different treatments for the ultimate inspiration and information.
It is important to remember that you need to maintain tension in the tweezer once you have constructed your fan as it will only be secure once you have dipped the base in adhesive.
Struggling with this step? Try easy fan lashes.
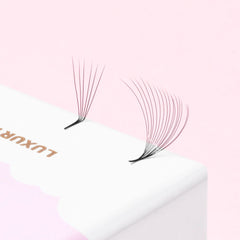
Easy fan lashes are a dream come true for beginner lash technicians and those who want to make the pinch method even easier. Easy fan lashes are heat bonded at the base of the lash, which means that you do not have to maintain as much grip in the tweezers when you have created your fan as the bases of the lashes adhere to each other.
@belolash Belo Lash Dainty Volume Tweezer🖤 #fyp #foryou #lashextensions #uklashtech #lashes #viral #trending ♬ Stars - Official Sound Studio
Step 3: Use the Adhesive
Once you have snatched the base of the fan, lightly dip it into your adhesive. Always remember that adhesive sweet spot. Too much adhesive will weigh down your client's natural lashes, affecting your isolation and making them look clumpy. While too little adhesive will make your client complain about poor retention.
Next, place your volume fan onto your client's isolated lash as normal, leaving a little space before the lash line to protect the lash growth cycle. And voilá, you would have created the most beautiful and perfect fan!
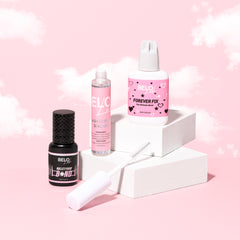
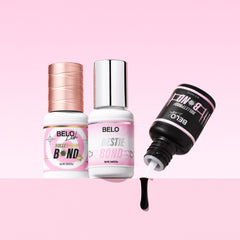
This technique will create more of a snatched base for your client's volume fans, so it is perfect for any volume look, especially mega volume when you need to fit wider fans across the lash line. When using the pinch method, ensure you use a top-quality adhesive to get the job done. As the pinch method speeds up your lashing time, we recommend using a quicker drying glue (if you have enough experience and practice) like our 1 second drying time adhesive, Bulletproof Bond. If you’re super speedy, use Bulletproof Max, which has a 0.5 second drying time.
Voilá - Perfect Volume Extensions for Your Client
And voilá, once you have this technique down, you can create perfect volume fans for your clients!
The pinching technique can be tricky, but once you learn how to perfect it, you won't want to use any method for volume lash fans. It's not always easy learning a new technique at first, but it will become second nature to you after some practice.
If you’re a beginner lash tech looking to learn volume lashing techniques, opt for our Russian training course to learn everything you need to know about volume lashing, get accredited training and improve your skills.