


Creating wispy classic lashes for me was always a struggle, I’d finish the set and it would feel flat and not much different to every other classic set I’d created, I’d find myself scanning the set afterwards to identify where I’d even placed the wisps because it all seemed to merge into one, until I tried and tested a few times and found the perfect method.
The key thing to turn a classic set into a wispy classic set is to use a mix of lash extension lengths, diameters and sometimes even curls if you're feeling extra creative!
I’m going to talk you through step by step in as much depth as possible so that you’re able to use this recipe to create wispy classic lashes for your clients wanting that everyday mascara look.
Step 1: Cleanse & Prep Your Client’s Lashes
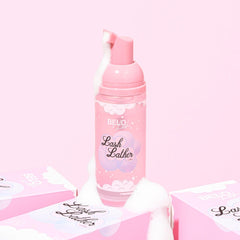
First things first I always cleanse the natural lashes using the BELO Lash Lather foaming lash cleanser, this helps to remove any oils or dirt from the natural lashes. Once lashes are cleansed I will use the dream on eyepads to secure my clients lower lashes and place a small amount of Nichiban tape on top to secure any baby lower lashes that are exposed.
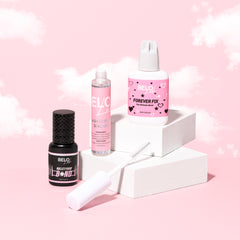
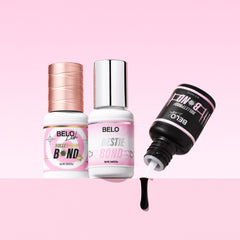
I will then go through the natural lashes with my Forever Fix lash primer on a microbrush. I find that Forever Fix is extra useful when doing a set of classics as it helps speed up the curing time of the lash glue and when doing a set of classics, the surface area of the adhesive is larger so it helps minimise any sticking during application.

Forever Fix Lash Primer, 15ml, £15.49
A good tip - whilst you’re cleansing your client’s lashes, speak to your client again about the sort of look they’re wanting to achieve. This will give you an idea of the lengths you will use and avoid any last minute change of heart!
Step 2: Prep the Lashes You’re Using in the Set
Once lashes are cleansed and prepped I will prepare my lash extensions, for a natural wispy classic set I tend to use four main lengths: 8mm/10mm/12mm/14mm this can be adapted if your client is wanting a shorter set to 6mm/8mm/10mm/12mm or 10mm/12mm/14mm/16mm for a client wanting a longer more dramatic look. The key is to skip lengths to create a jump for the wisps to stand out!
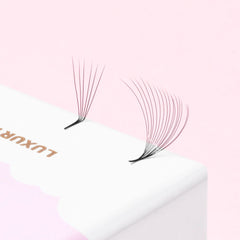
For wispy classic lashes, I always use the cashmere classic lashes, they are slightly split at the tip which gives a softer finish and adds to the wispy effect.

Classic Cashmere Lashes, £13.49 per tray
A tip I find makes a big difference - use a 0.15 for the wisps and 0.20 for the fill area, this helps to create that dark lash line eyeliner effect whilst keeping the top line or tips of the lashes airy and wispy.
Step 3: Wispy Classic Lashes Application
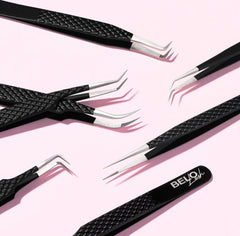
Moving onto application now, with a wispy set we really want to ensure the longer lengths which act as our wisps are sitting on the top layer of the clients natural lashes, I find the easiest way to do this is by placing a hydrogel eye pad on top of the lashes and pulling out the top layer only from under it using my BELO baby isolation tweezer.
 BELO Baby Isolation Lash Tweezer, £14.99
Longer lash lengths on the top lash layer
Once I have exposed the top layer of my client’s natural lashes, I will begin to place my wisps so for this layer, if I am using 8mm/10mm/12mm/14mm in the set, I will place only 14mm on this layer with a couple of 12mm for the inner corner wisps!
If your client has quite full natural lashes you really want to utilise this top layer and pack it out with your 14mm wisps. From experience, if there isn’t enough length placed on the top layer of the natural lashes, they can easily get lost when we come to fill in the lash line and you won’t get the same wispy classic lash finish.
Placement is SO important for this top layer, ensure you hold the lash in place until it is fully adhered to avoid it falling to the side, we definitely don’t want criss cross wisps!
Fill in the mid & lower layers of the lashes with varying lengths
Once I’ve placed my wisps and I’m happy with the coverage I will then remove the hydrogel eyepad I placed on top of the rest of the lashes, exposing the mid and lower layers of the lash line. On the mid & lower lashes, I will now use a mix of my other lengths in 0.20d 8mm/10mm/12mm.
I usually work on the inner corner first placing my shortest lengths here, so in this case 8mm. Once the inner corner is complete I will then fill between my wisps using 10mm & 12mm on rotation, so I place one 10mm followed by a 12mm.
Mixing the lengths like this on rotation keeps that wispy finish even on the mid layers, it’s just more subtle here but creates dimension.

There you have it - wispy classic lashes that elevate timeless classic lash look!
Step 4: Lock In Sealant for Retention
Once I’m happy with the coverage and the wispy classic lash set is complete I always then finish off with our Lock It In lash sealant, this product has genuinely made the biggest difference to my retention especially with classic cashmere lashes, where your client will notice gaps more quickly than with volume lashes.

Lock It In Lash Sealant, £16.99


