As lash techs, we all know how important eyelash maintenance and hygiene are in keeping your lashes looking perfect all day. But do your clients know this? Proper care and cleaning are essential for maintaining the longevity of their new lash extensions in between appointments.
In this blog, we'll be going through detailed tips on how to clean eyelash extensions, which you can then pass on to your clients after treatments. By empowering your clients with these tips and tricks, you'll be able to build a stronger relationship with your client base while also ensuring their new eyelash extensions are always looking and feeling their best.
Why do clients need to clean their lash extensions?
While cleaning your client's lashes is an important pre-treatment step, it's just as essential to clean your lash extensions in between treatments as well. Dirty lashes will lead to reduced retention, which means the lash extensions won't last as long as they could. Regularly cleaning lash extensions will prevent dirt and oil from accumulating and help maximise lash retention.
Regular cleaning will also reduce the risk of your clients contracting any eye infections or experiencing irritation.
Excess oil and makeup residue can also compromise the integrity of the eyelash extensions, so regularly cleaning them will help preserve the quality of their new lash extensions.
Tools needed:
- Oil-free makeup remover: Oil-based products will weaken the bond between the lash adhesive and the client's natural lashes, which will then reduce the lash extension's longevity. If your client regularly wears makeup, make sure they're also using an oil-free makeup remover as part of their skincare routine.
-
Lash cleanser: Lash cleansers, also called lash shampoo, are specially formulated to clean eyelash extensions and are gentle enough to be used around the eye area.
If they've run out of lash cleanser, baby shampoo can also work in a pinch! They'll just need to dilute it with a small amount of water first before use. - Lash cleanser brush: A specially designed cleansing brush will have fibres that can get in between the eyelash extensions fibres and provide a thorough cleanse.
- Clean mascara wand or spoolie brush: A clean mascara brush will help your clients separate and untangle their eyelashes after cleaning them.
Step-by-step guide
Now that we've covered the tools your clients will need, here's a step-by-step guide on how to clean lash extensions to help maintain eye health and lash retention. Be sure to go through these steps after every treatment with your clients.
Remove makeup
For clients that wear makeup, it's important to thoroughly remove it before cleaning eyelash extensions. When removing eye makeup, make sure they use gentle motions and avoid rubbing their eyes and lashes too harshly as that can irritate their eyes and weaken the bond between the eyelash extensions and adhesive.
Cotton buds can be useful for cleaning eyelashes as they help remove makeup in a targeted and precise way. Your clients should avoid using cotton pads on their lashes as they can snag on the lash extensions and cause them to fall off.
Wet your lashes
After removing makeup, your clients will need to wet their lash extensions using lukewarm or warm water. Make sure they don't use hot water as that can damage the extensions.
Likewise, ice-cold water won't effectively remove any excess oil, dirt, and makeup. Find that Goldilocks zone and your clients will be able to clean their eyelash extensions much more effectively.
Apply lash cleanser
Once their lashes are wet, they can start applying the lash cleanser. For extra gentle cleansing, we recommend using a lash cleanser brush that will provide a deep clean without irritating their eyes. Simply pump a small amount of the cleanser right onto the brush and start to gently dab it onto their lash line.
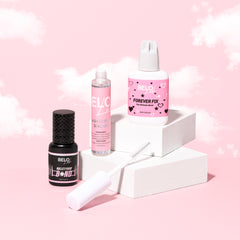
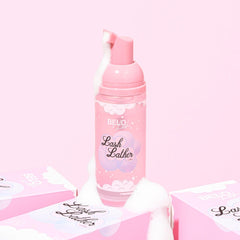
(Psst! Looking for a new lash cleanser? Check out BELO Lash's very own Lash Cleanser, a gentle foaming cleanser that's extremely effective at cleaning lashes while also being gentle enough for use around the eye area.)
Gently clean lash extensions
Now onto the fun part! To properly clean their lash extensions, your clients will need to work the cleanser gently by moving the lash brush in slow up and down motions as well as swooping motions along the lash line.
Make sure you remind them to concentrate on the base of their lashes as that's where dead skin cells and oil tend to accumulate. For a thorough clean, simply repeat the process several times until their eyes feel squeaky clean and refreshed.
Similarly to the make up removal process, you also need to warn your clients against rubbing their eyes as this can lead to their lash extensions falling out prematurely.
Rinse your eyes
Once your client feels their lashes have been cleaned properly, they can gently rinse the cleanser off with cool or lukewarm water. Your clients can either splash the water onto their face with their hands or rinse the cleansing brush and use it to dab water onto the eye area and lash extensions until there's no trace of cleanser and dirt left.
Gently pat dry
After rinsing the cleanser out, they'll need to thoroughly dry their lashes. A lint free clean towel is the ideal tool to use and perfect if they only have classic lashes on. With the clean towel, simply dab their lashes and eye area until they feel dry.
If they don't have a clean towel with them, they can also use a soft piece of tissue or even air dry their lash extensions.
If your client has Russian volume lashes, they might need a bit of extra help with the drying process. This is because volume lashes tend to hold on to more water and may have trouble drying properly. An easy solution is to dry their lashes with a quick blow using a hairdryer - just make sure they use a cool, low setting.
Comb lashes out
Once their lashes dry, your client will need to comb their eyelashes out with a clean mascara wand or spoolie brush. Combing them will help to create the perfect curl and maintain their gorgeous shape. This is especially important if they're wearing volume lashes as the lashes might close together during the cleansing process.
To recurl their lashes, they'll need to start from the base of their lashes and comb through them gently while following the shape of the curl. Once they've properly fanned out their lash extensions, they'll immediately notice instant fluff and the return of the perfect curl!
How often should clients clean their lash extensions?
The answer depends on your client's lifestyle and skin type. If they have oily eyelids or wear eye makeup regularly, they should be cleaning their lash extensions daily. If this isn't an issue for them, 2-3 times a week should be perfectly fine.
They should also clean their extensions immediately after any physical activities like swimming or sweaty gym sessions.
Conclusion
Eyelash extensions are a great way to enhance someone's natural beauty, but they do require proper cleaning to keep the lashes looking gorgeous and ensure their longevity. To maintain the look of their lash extensions in between appointments, it's important to educate your clients on proper lash cleaning techniques.
We hope our handy tips and detailed guide to lash cleaning will help you empower your clients so that they'll be able to clean their eyelash extensions effectively and enjoy their stunning lashes for weeks to come. Make sure you remind them to use a gentle cleanser, be gentle when cleaning their lashes, and maintain a consistent lash-cleaning routine.
If you're looking to upgrade your lash cleaning process, we've got you covered! Our lashing experts here at BELO Lash have formulated a range of high-quality pre-treatment and post-treatment lash products to help you put together the perfect lash extension treatments. From lash cleansers, lash sealants, cleansing brushes and more, our collection has everything you need to create the perfect eyelash extension treatment for your clients.

