





If you’re not already offering wet look lashes on your service list because you're not sure exactly how to create them, this blog is for you. We are going to breakdown not only what exactly wet look lashes are but also exactly how to create them!
We notice within the industry confusion comes from comparing wet look lashes to angel lashes as part of the concept is the same, but the two styles differ massively.
Wet look lashes are exactly what they say in their name, the aim is to create a lash set that looks like your client has applied mascara/ oils to their lashes. Rather than the lashes being fanned like in a traditional volume set, they are kept completely closed to achieve that “wet” appearance.
So to make it simple and to avoid you getting any more confused between the two, here are the main differences between ‘wet look’ and ‘angel’ lashes:
Wet look lashes vs Angel lashes: what's the difference?
|
WET LOOK LASH |
ANGEL LASH |
|
Fibres stay as closed as possible. Tips of the lash extensions are often sealed with the assistance of superbonder or lash sealant |
Fibres stay closed but still keep their fluffy, split tip appearance at the tips of the lashes. |
|
Usually uses 2-5 fibres 0.5-0.7 diameter. |
Usually uses 2-5 fibres 0.3 diameter. |
|
A more dense, dark, spiky appearance |
A lighter, softer, fluffy classic appearance |
Who is the perfect client for a set of wet look lashes?
Because wet look lashes can be adapted by using any lash map, different diameters, or lash extension lengths, pretty much every single client is suitable for a wet look lash set.
Clients that like the dense, dark look of volume lashes but want something a little more choppy, mascara looking are the perfect candidates!
Are there any clients you should avoid doing a wet look set on?
From experience, a wet look set isn’t best suited to clients with sparse or very light coloured lashes, due to the lashes not being fanned, it is harder to conceal gaps so they can appear more apparent with a set like this.
How exactly do you create a set of wet look lashes?
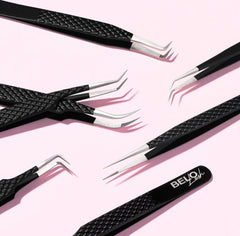
So first of all you will need some 0.5d velvet volume lashes to create this look, you will also need a tweezer with a STRONG grip (you don’t want any fibres sliding through separately when you are collecting your lashes as its so important when creating wet look lash set like this that the fibres stay together, and will make your like 10000x easier!)

Velvet Volume Re-Edition Russian Lashes, £12.99 per tray
Ideally, you also want a fast drying lash adhesive as with a wet set we are applying the adhesive to 2-3 of the lash extensions, so a slower drying adhesive can be a nightmare for stickies!
As we explained earlier, a wet set can be created without bonder/sealant and just your skill and the tweezer, so we will explain how you can do this first!
-
Take your tweezer and peel 2-5 fibres from your lash strip: the key here is to have your tweezer as high to the tip of the lashes as possible to ensure the tips stay together like a spike and do not fluff out like a regular volume fan, you also need to make sure the fibres come off in unison, so they’re all sitting at the same height! Pro tip: we recommend our 90 degree diamond tip tweezer or curved volume tweezer.
-
Dip the lashes into your chosen lash adhesive, Bulletproof Bond & Bulletproof Max are a perfect choice: bullet max offers a 0.5 second setting time and bulletproof bond a 1 second setting time with a slightly thinner consistency. You want to dip your lashes 2/3 of the way, similar to how you would with a classic lash.
-
Attach the lash extensions to the natural lash: either on top, underneath or to the side of the natural lash, ensuring you focus on keeping a good direction on the extension.

Bulletproof Max Lash Adhesive, 5ml, £26.49
Pro tip: If you struggle to create wet look lashes this way, you can introduce a sealant or a bonder. A sealant will offer more of a ‘stick’ following the appointment as opposed to a bonder that will help assist you during the appointment. We would recommend experimenting with the two to see which you prefer and which your clients also prefer, each will give a different finish!
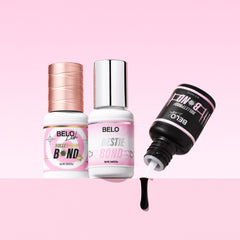
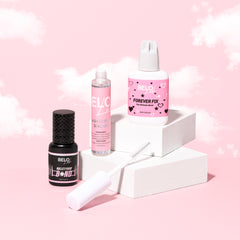
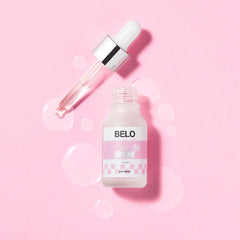
You can find these both in our shop, the lock it in lash sealant and the little quickie lash superbonder.

Little Quickie Lash Superbonder, £23.49
Alternative Step 1 for a wet look lash set:
-
Taking your sealant or superbonder, brush a small amount through the lash strip, this will force the lashes to sit together in places and make it easier for you to retrieve the lashes whilst keeping that spiky/wet look appearance.
Is there a specific map you should follow?
There is no specific map you need to follow when creating a wet look lash set, it can be fully customised to your clients preferred length and shape. However, we do think a mix of lengths and curls and working in layers works really well with a set like this. For example, you could apply shorter lashes to the lower lashes of lashes and maybe a softer curl to improve the contrast and dynamics in the set.


